Tuesday, October 29, 2013

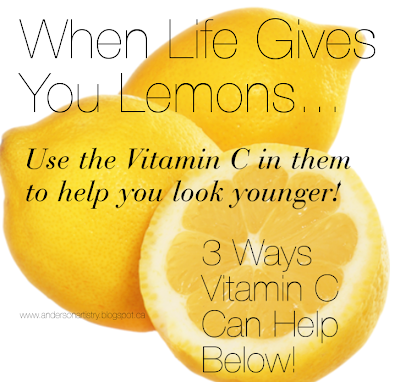
When life gives you lemons....


Did you know that as we age we loose the Vitamin C in our skin? Luckily lemons have all the vitamin C that we need to help us feel fresh again. 

I like to think of vitamin C as the BLT. It helps brighten, lighten, and tighten our skin.

Vitamin C is critical for your body and it helps play an important role in maintaining healthy and resilient skin. It is an important factor in collagen production. It is useful in wound healing of all types. From cuts and broken bones to burns and recovery from surgical wounds, vitamin C taken orally can help wounds heal faster and better. 

I was recently watching the Dr. Oz Show and found some pretty interesting info on there about the benefits lemons can be to us! Here are a couple things you can try and that I am going to be trying. Thanks Dr. Oz for the awesome tips and I am happy that I am able to share them with you! 


1. Age Spots
The best way to use vitamin C on your age spots is lemon juice. The citric acid in lemon juice can help gradually fade the spots and help even your skin tone.
It's simple: Dab lemon juice onto your age spots daily. Let it sit for 5 to 10 minutes and say good-bye to unwanted spots.
2. Wrinkles and Fine Lines
Wrinkles form on the parts of your face that move the most. Underneath your top layer of skin, you have collagen – a connecting tissue that keeps your skin layers together. As you get older, you start to lose some collagen, which causes the skin to sink and create wrinkles. To fight wrinkles, try adding a healthy dose of vitamin C into your diet.
Eat foods rich in vitamin C: lemons, strawberries, papaya and pineapple. With the help of these delicious snacks, your body will create more collagen, helping to prevent pesky wrinkles.
3. Sagging Skin
Using vitamin C on your skin helps boost your collagen, which will bring elasticity back to your skin and can prevent sagging in as little as two weeks.
You can do it yourself: Mix some lemon juice into your moisturizer or look for a moisturizer made with vitmain C. Apply once a day in the morning and you're done.
I use moisturizer every day so why not make some to help boost my collagen in my skin. Dr. Oz says you can use it in certain spots or all over your face! I plan to try to use it every morning all over my face! Its never to late to start using things that help prevent aging! 

I'd love to hear about if you will be trying any of these easy tips to help reduce age spots or sagging skin! Thanks for stopping by! 

XO MARISA
Monday, October 28, 2013

Goals for Eye Shapes


Have you ever been frustrated with your eye shape? Well there is nothing really that you can do about it but try to work with them the best you can! Here are a couple tips for different eye shapes that you can try.


Deep set: Goal is to bring eyelid forward using lighter colors and recede brown bone threw shading with matte neutral-tone (brown or taupe). Avoid extending eye shadow too far out of crease as it can make eyes appear down turned.

Example:


Wide set: Goal is to bring eyes closer together. Using med neutral matte tone, inner crease. Refrain from wing liner, as it will draw eyes further apart. Instead, line eyes around entire eye. Can also fill in brows to be closer together if too far apart.

Example:


Mature/Aging Eyes: Goal is to make eyes appear more open and lifted, use all matte tones, neutral. When applying shadow in the crease makes sure eyes are open and not lifted with a finger to ensure that the crease isn’t too high or low.


Protruding: Goal is to flatten eye and push back wing, darker smokey eye affect, lining around entire eye. Use thick liner.

Example: 

Close set eyes: Goal is to pull eyes further apart by extending eye shadows beyond corner of eye lighter on inner corner of eyes.

Example: 


Descending eyes: Goal is to life the eyes by placing eye shadow to grade slowly upwards over brow bone or fold of skin, in order to give the appearance of “pushing back“ the heaviness and getting rid of the droopy eye look.   


Hooded Eyes: Goal is to draw the focus upward. Shimmer on brow bone to help highlight. Create a crease with a darker color. Be sure to tightline to create the appearance of more open eyes. 

Example: 


Monolid: Goal is to create crease contour with 3-tier effect, concentrating matte neutral color in crease of eyeball. Second look: Smokey eye; style where placement of the contour is ignored completely and shadow is shaded from darkest at the lash line and faded up under brow. A monolid doesn't have much of a crease so its important to try to create one. 

Example: 


I'd love to hear any comments or suggestions! Thanks for stopping by!!! 


Wednesday, September 11, 2013

Goal Setting


Hey guys! How are ya? Lately I have been thinking about a lot of things I want to do in my life and things that I want to accomplish. So I made a list of all the goals that I want to do. I wrote them down on a piece of paper and put that up next to my bed. This way I will see it every night and every morning. I will be reminded of my goals and the proper things that I need to be doing daily to help me achieve them. 

What are some of your goals?!

Some of my goals currently are:

Being a good mother
Not being on my phone when my daughters awake
Supporting my husband 
Appreciating my health
Being optimistic
Eating more healthy

The list goes on and on. 


Here are some ideas for goal setting! 


Word wall art
zgallerie.com


Asian home decor
etsy.com


Please leave a comment where you are from and what your goals are!


Wednesday, August 28, 2013

My Top Fav Products

My Top Fav Products


Benefit blush brush
benefitcosmetics.com


MAC Cosmetics pencil eye liner
bloomingdales.com


Covergirl mascara
target.com


Styling product
taigan.com


What are some of your favorite products?
I would love to hear them! Please comment below!


Mommy Makeup Update: What I used

MOMMY MAKEUP


Mac cosmetic
$33 - debenhams.com


Voluminous mascara
target.com


Mac cosmetic
nordstrom.com


Beauty product
maybelline.com


Thanks for stoping by!! I have had a ton of question about what products I used so here they are! Enjoy!! 


Thursday, August 22, 2013

Mommy Makeup


So I don't know if I am the only mom who runs out of the house sometimes looking a little crazy. My hairs in a wild bun, no makeup... lets just say... NOT HOT. I have found a routine that is pretty quick I think it takes me about 2 or 3 minutes and I just feel so much better with the little bit of makeup that I do put on.

I have had too many times when I'm at the grocery store or something looking like a crazy mom, not ready at all when I see someone I know. It's like playing hide and seek. "Oh crap! I hope they didn't see me." Then you go into stealth mode and tip toe around trying to finish your shopping without being seen by someone you know. It's sad but its the truth. Here is a quick way to do mommy makeup.

Or if you just don't like to wear makeup then this is the post for you! Super easy makeup that's super quick! What's better than that? 


P.S. These videos are super embarrassing... Don't mind them! I just don't have another way to show you! haha


**** UPDATE*** People told me they couldn't watch the video, So I uploaded one from Youtube that hopefully will work better. The other won't let me delete it so now I have two! hahaha THEY ARE THE SAME VIDEO :) Thanks again guys for all your patience!!


Hope you liked the post! I love getting comments so please leave some love :)
Share where you are visiting from! 


Friday, July 26, 2013

Tightlining Like A Pro


I have had a couple readers want to read about Tightlining so hear it is! If you don't know what Tightlining is thats okay. A lot of people have never heard of it. I, on the other hand, am obsessed with using this technique for makeup. It is like invisible eyeliner that makes your lashes look longer and more full! Who doesn't want long and thick lashes?! I use tightlining on every single client and on my self every day because it doesn't look like your wearing eyeliner and it really makes your eyes pop!


So what you want to do is pull your eyelid open and grab either black eyeliner or an angle brush with either liquid eyeliner on it or even black eyeshadow with some water to make your own eyeliner. You want to start on the outside and go inwards. If this is your first time doing it, your eyes will water!


So before I post some pictures of me of some examples of tightlining let me say that when I used to tightline, I always did the bottom water line. Now that I do makeup I know that it makes my eyes look a lot SMALLER when I do my bottom waterline. I usually just do my TOP waterline now. Here are some examples of tightlining I USED to do. Yes... Very Dramatic, I know!


Here is a picture of Kim K with her TOP waterline "tightlined".

Zooey Deschanel tightlines her TOP waterline.


Mila Kunis tightlines her entire eye, top and bottom waterlines.


So depending on what you are looking for you can either tightline your whole eye or just the top waterline or even just the bottom. Its pretty much whatever you want :) As long as you go from the outer corner of the eye all the way to the tear duct. It may smudge to the bottom the first couple blinks but if you wet a Q-tip and wipe away the left over on the bottom lash line you should be good! I would love to hear your comments or suggestions about Tightlining! 


I would love to hear all your comments!! 

Thanks for stoping by,


Sunday, July 14, 2013

Its Summer!

Gosh, first off I have to apologize for the lack of blog posts. We have had a wild summer and it continues to get more wild. Here is what we have been up to! I promise a makeup post will happen soon! 


Reese's First Birthday was June 12th so we had to throw baby girl a party! 


Reese's Smash Cake!


From June 25th to July 9th we headed to Emerald Isle, NC for some fun in the sun!


The Anderson Clan (minus one, hes on a LDS mission) 


We also got to see Curt's best friend Harris and his wife Kathleen and their adorable little boy!


We also spend quite a bit of time down in southern Alberta. Here are some pics from Waterton National Park.


I'm sure we will have many more trips this summer!

Again, I promise I will have some makeup posts coming soon!

Thanks! 


Related Posts Plugin for WordPress, Blogger...